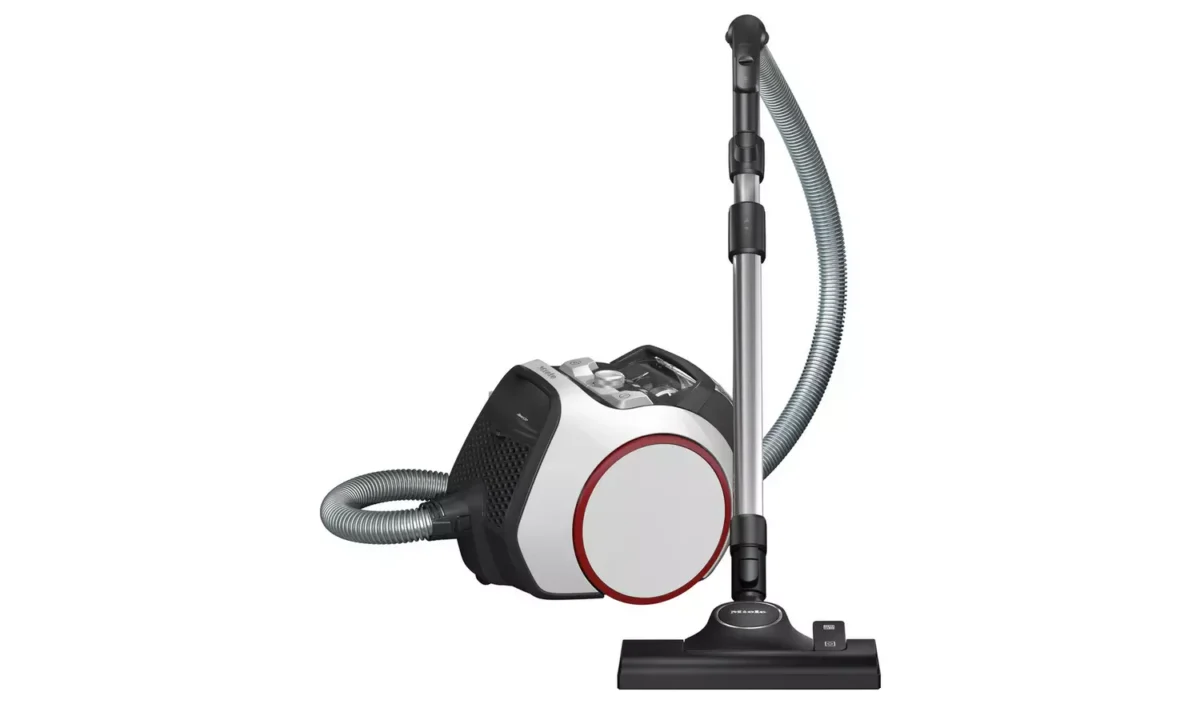
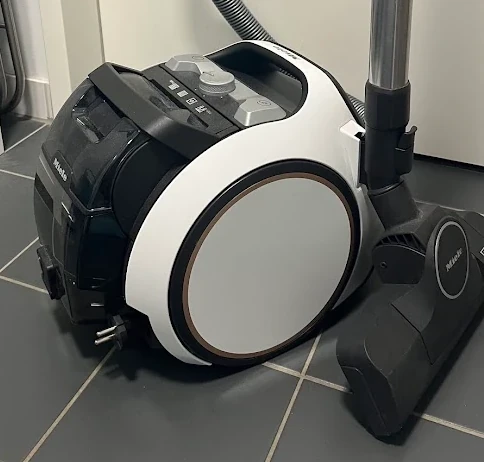
How I Resurrected Our Miele Boost CX1 Vacuum After a Water Disaster!
The Day Everything Went Wrong
The water incident wasn’t even the worst part of that week!
It began two days earlier, when our son had come down with a sudden stomach bug. You know the kind, one minute they are bouncing off the walls, the next they are ghostly pale and whispering, “My tummy hurts.”
He went over to his bed and lay down there for a while, then suddenly, unable to even make it out of his bed and reach the bucket. Right there from his bed, and all over the carpet, the poor boy threw up, like a missile strike. The carpet bore the brunt. It was bad. Really bad.
I moved the carpet outside. Out came the hot water, the soap, and a good scrubbing. As a dad trying to hold it all together, I did what I thought was responsible: The carpet was spotless. The carpet was spotless, and I was drenched with a bucketful of sweat.
Disasterous Decision – I vacuumed the wet carpet!
Somehow, I needed to get rid of the excess water from the heavily soaked carpet, right? I used the broomstick, which wasn’t very helpful.
Then, I thought of our Miele Boost CX1 hover; our trusty sidekick, had always been brilliant. So, I grabbed and happily went over the area thoroughly. I must admit, it did a good job too. All the water, gone. Brilliant!
I hung the carpet over the railing to dry out over the next two days. In the meantime, I emptied the hover tank, removed the filters, and placed them outside to let them dry out thoroughly.
Pretty chuffed with all the work I did, and patted myself for a job well done.
The next day, ensuring everything was dry, I put the hover back together and placed it in its usual corner.

The Shocking Realisation
This Saturday morning, I heard my dear wifey call me, and as a devoted husband, I hopped over to her like Spiderman, swish.
She said, “I switched on the hover, it made a strange short crackle, and then died on me! Very strange. Can you have a look, please?”
She went on murmuring, “These manufacturers, they know exactly when the machine breaks down and provide cover just up to that point! I’m not impressed with them and I’m never going to buy a Miele ever again!”
In the meantime, I was quietly trying to revive it, but to no avail! I wondered why it would suddenly die like that.
What I didn’t think of, even at that moment, was that although the hover was an excellent machine, it was not meant to sucking in water. My worst fear – “I might have ruined our €300 Miele vacuum?”

The Panic Phase: Googling, Guessing, and Regret
I admit, deep within me, I was panicking, and wondering how do I tell her what I had done. I composed myself, gathered all the courage and said to my wifey, “Darling, I might be the reason for the death of the hover! I vacuumed the carpet the other day, to extract all the excess water!”
Oh, that look in her eyes. I had to fix it somehow, or else! I told her not to worry, and reassured her that I would fix it.
First thing I did? The panic search. “Miele Boost CX1 not turning on after hovering water.”
First thing I did? The panic search. “Miele Boost CX1 not turning on after hovering water.”
Helpful results? None. Mostly doom.
- “You don’t vacuum water with a dry vac!”,
- “Contact the manufacturer and pay €80/hour labour fee”,
- “Best to invent on a new one mate.”
…they all screamed, after the fact.
Well, let’s be real: this Miele wasn’t a €60 stick vacuum. It’s a serious piece of kit, and parts alone can cost you a small fortune.
There’s something about a fried appliance, especially one you’ve come to rely on, that feels oddly personal.
But here’s the truth: most small electronics, including vacuums, can survive water damage if you act quickly, calmly, and strategically.
The Plan: I’m Going In
This wasn’t just about a vacuum anymore. This was personal.
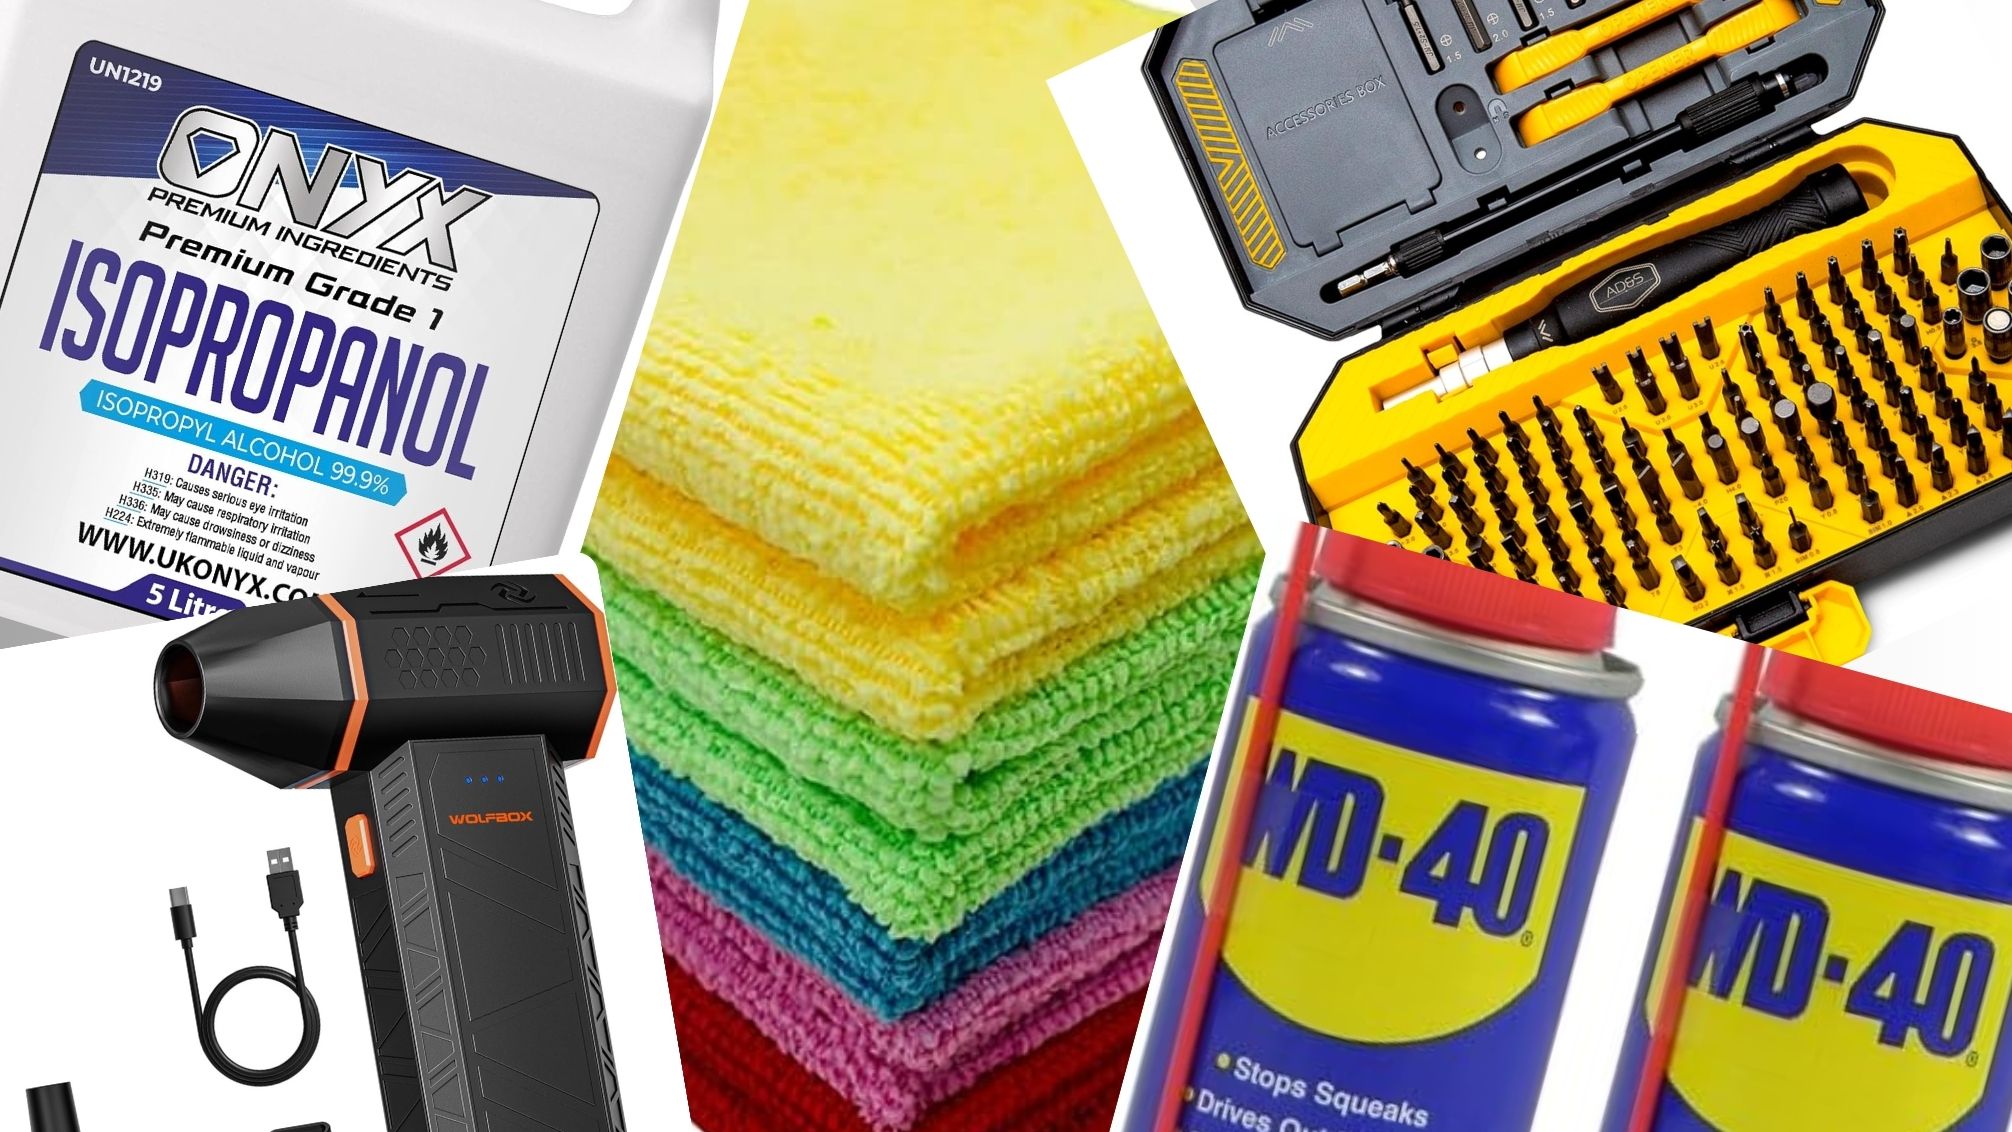
I grabbed:
- A full Torx screwdriver set
- Microfibre cloths
- WD-40 and isopropyl alcohol
- Compressed air
- My phone (to take photos – smart me)
- A large towel (for the table and my sweat and tears)
Goal? Tear it down. Clean it up. Bring it back to life.
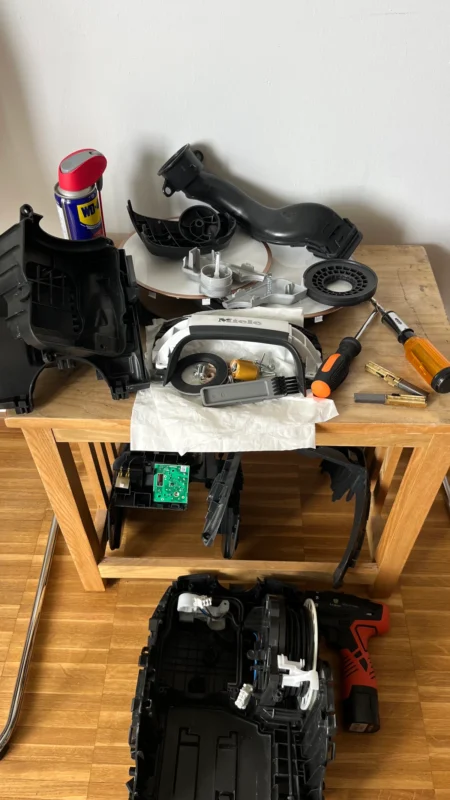
I set up on the dining table, laid out every tool like a battlefield surgeon, and said to myself, “Let’s do this.”
But First: What Happens When a Vacuum Inhales Water?
Googling the internet, I got a little wiser. I found out what actually goes wrong when water enters a vacuum like the Boost CX1:
- The filters clog: especially the fine dust and HEPA filters. Wet dust turns into sludge, which kills airflow.
- Moisture reaches the motor: water doesn’t mix well with carbon brushes or metal coils.
- Corrosion starts quickly: especially around contact points, bearings, and the motor casing.
- Electronics short out: Some Miele models have motor control boards or thermal cutoffs that are sensitive to moisture.
- Odour sets in: this is the silent killer. If mildew forms inside, you will smell it forever (unless cleaned thoroughly).
This is why it is important to take the vacuum apart, instead of just letting it “dry out”. Especially inside sealed plastic shells.
The Hidden Design Genius (and Frustration) of the Miele CX1
After a lot of head scratching, trying desperately to find the screws, the clips etc, searching the internet and YouTube for any previous experiences of similar mishaps.
Unfortunately, there was not a single post or discussion about this particular brand. However, I learnt a great deal from this experience.
So, let’s get to the guts of the thing. Taking apart the Miele Boost CX1 was a mix of detective work, on one hand, it’s beautifully engineered. Each component, from the cyclonic chamber to the retractable cords feel thoughtfully placed.
On the other hand, it’s intentionally difficult to disassemble. Most screws are Torx. There are hidden latches. Plastic tabs are just waiting to snap if you get too hasty.
But there’s beauty in that pain. Once you start unlocking the puzzle you begin to appreciate how each element contributes to airflow efficiency, noise reduction and structural integrity.
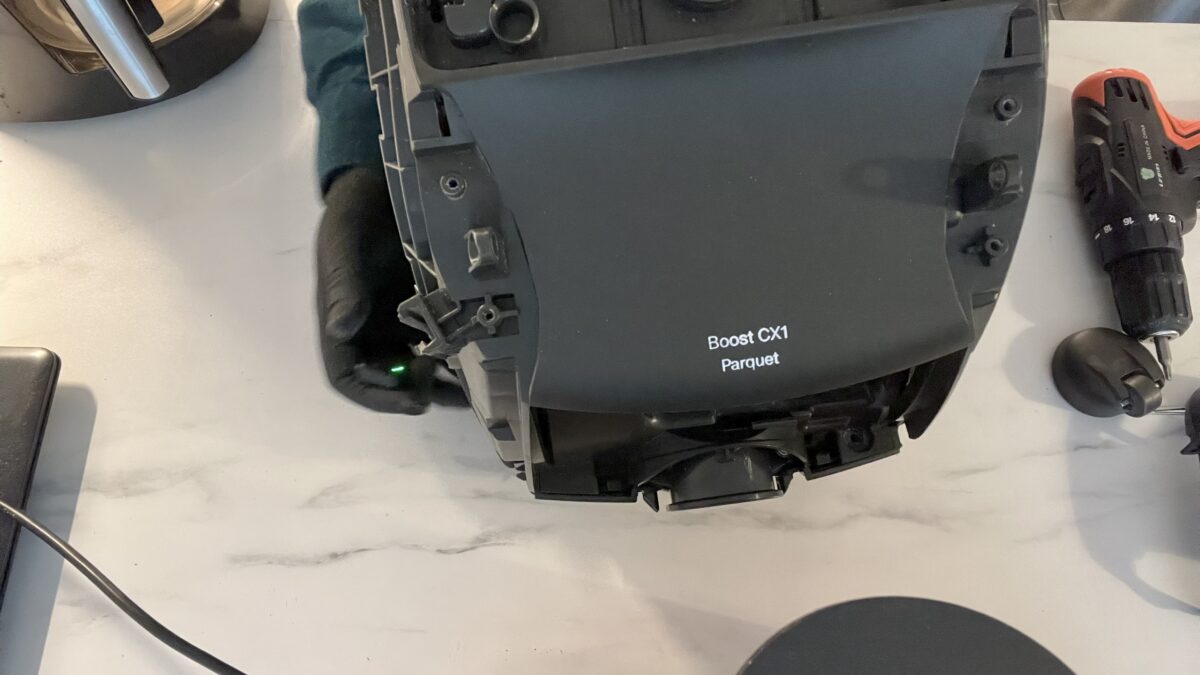
a. Removing the Housing and Wheels
I was already aware, Miele doesn’t want you to open this vacuum.
Hidden screws? Check. Screws under wheels? Check. Rubber gaskets that fight you? Also check.
First, I popped off the rear wheels using a flathead screwdriver. Underneath? Two Torx screws – T20s.
I removed the bottom cover, then hunted around for more screws. Behind the filters, under the cord reel, buried like treasure – found them all.
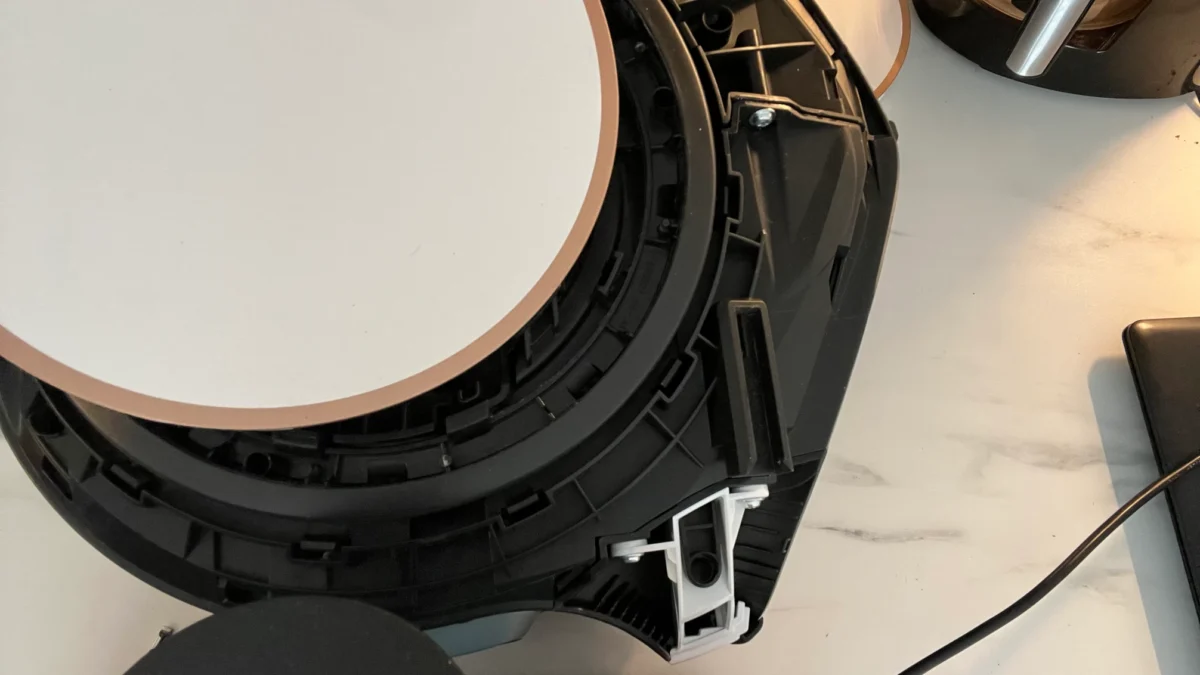
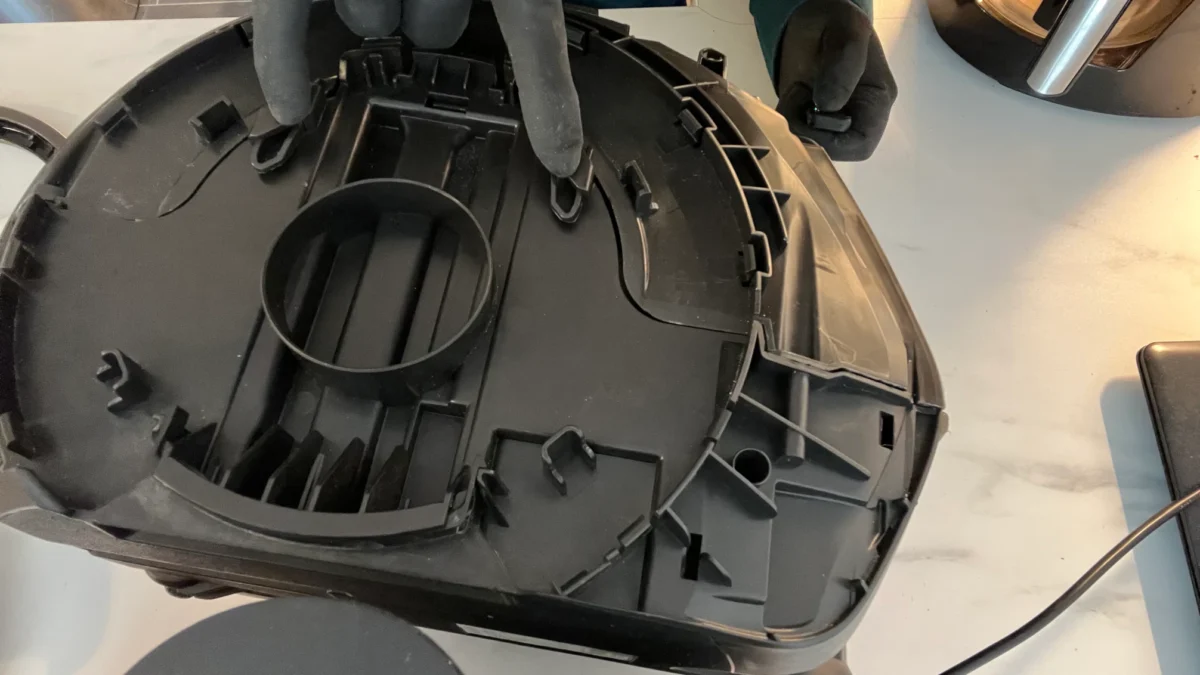
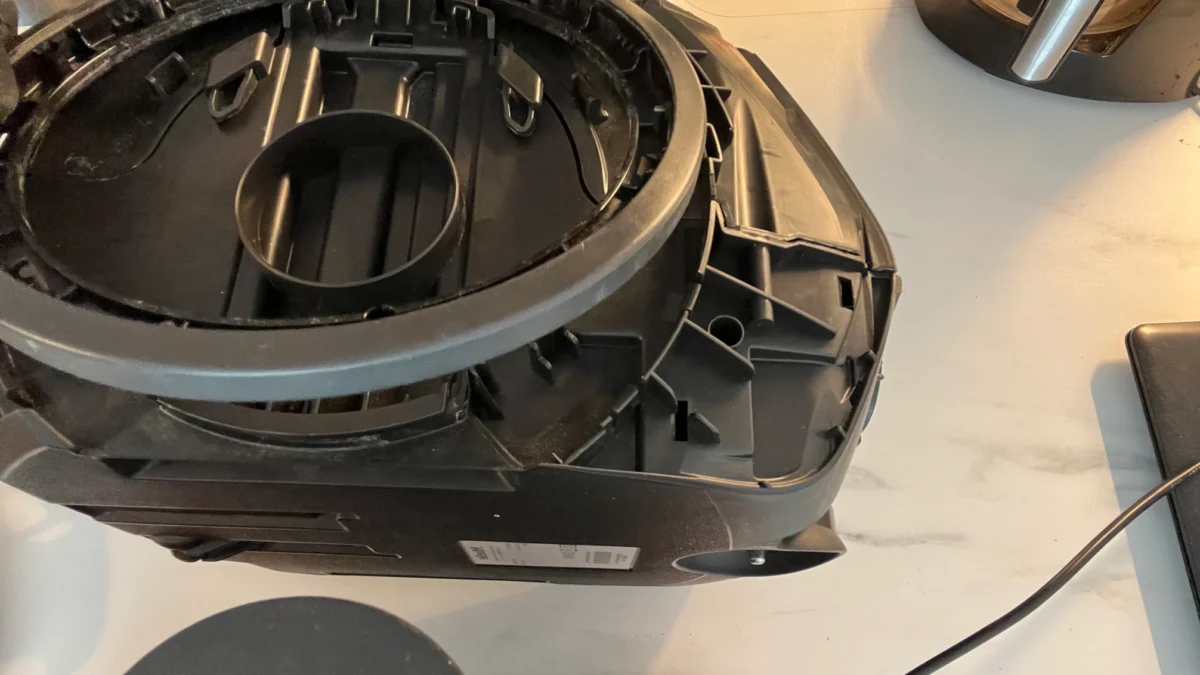
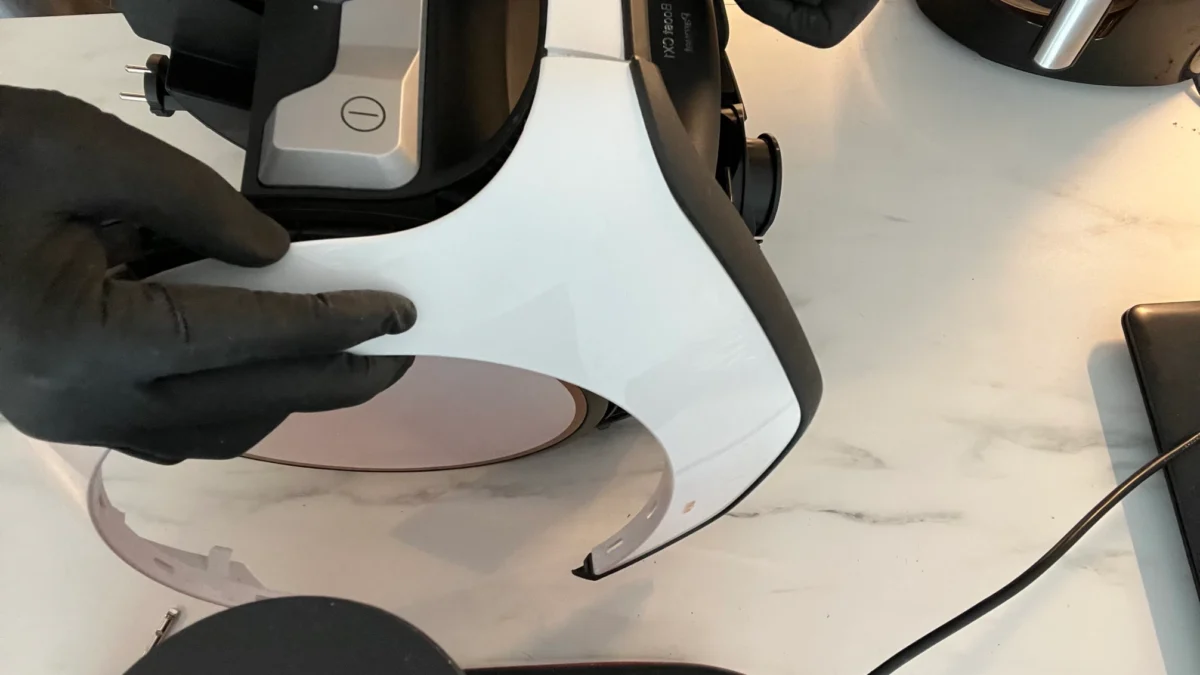
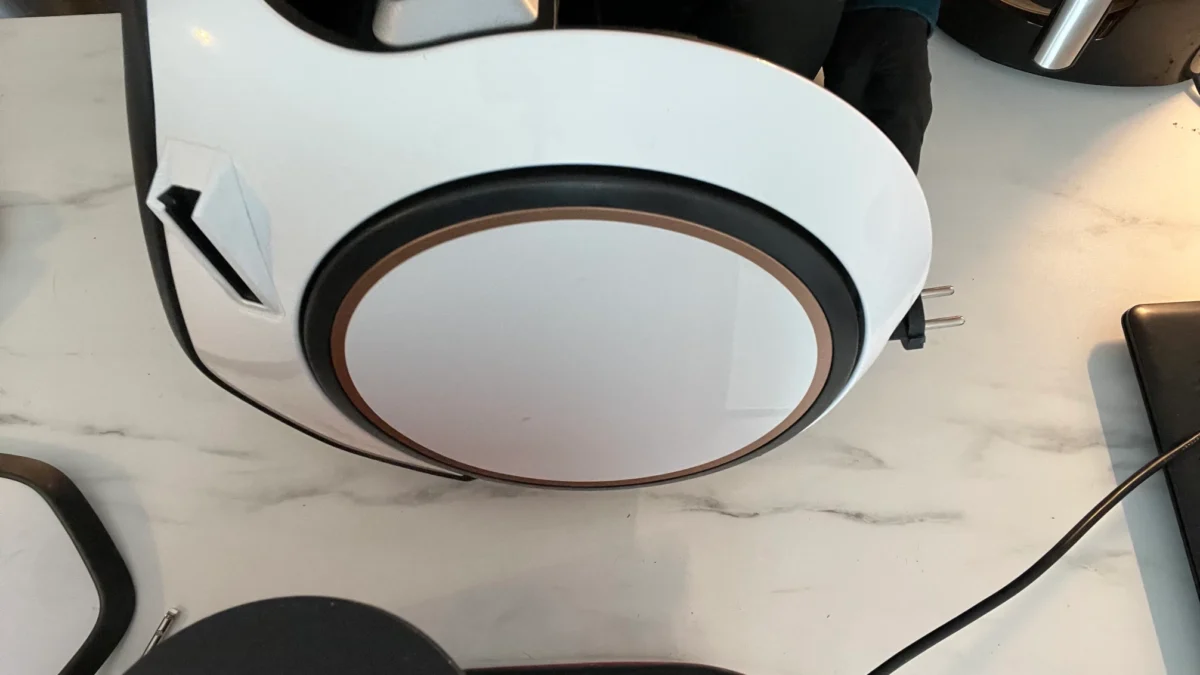
Removing the side wheels was another challenge. There’s a white central cap, which will need to be pryed out carefully.
Once off, you will see a ring that holds the compartment together. Next, the screws holding the upper and lower compartment together.
With careful prying (and muttered curses), the housing came off. I didn’t break a single tab. Proud moment. “YESSS!”
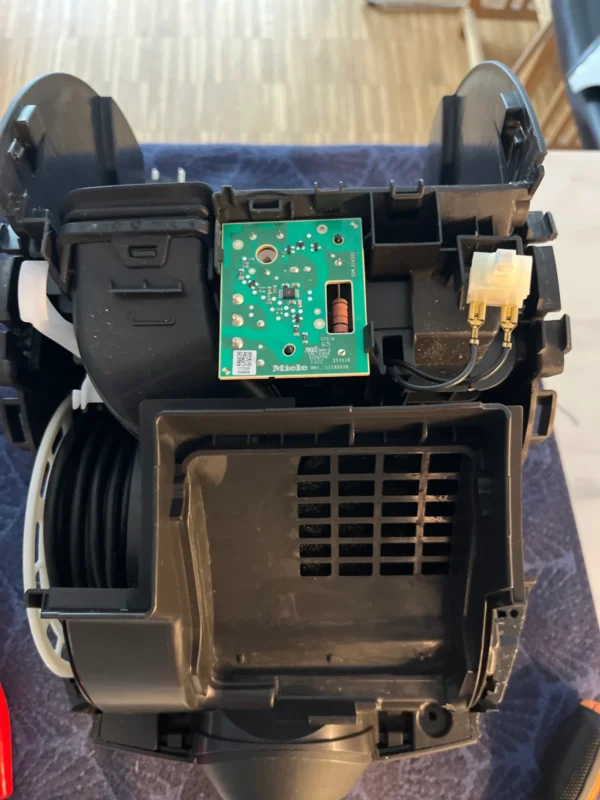
c. Accessing the Circuit Board and Cord Reel
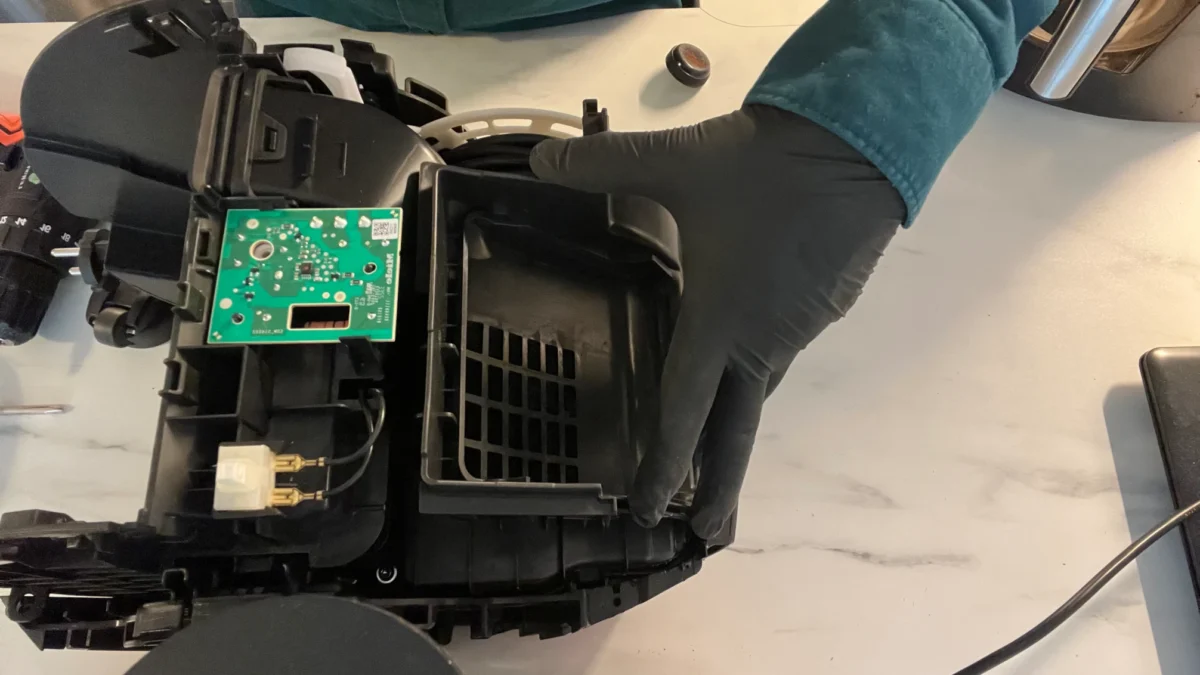
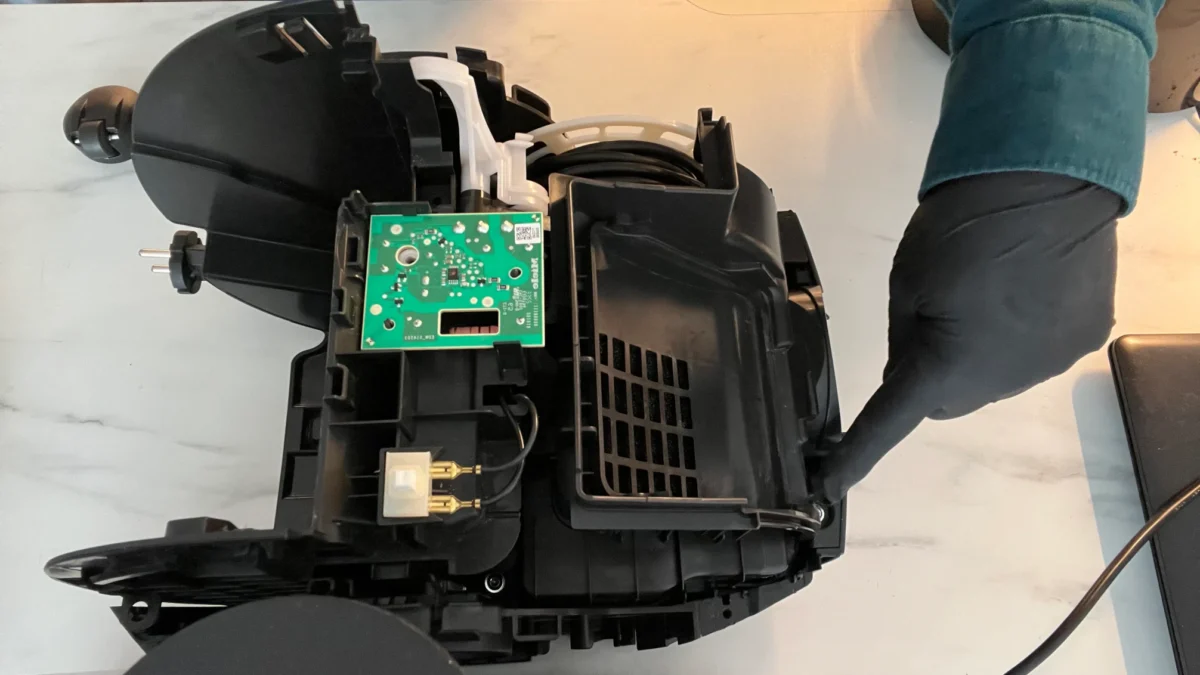
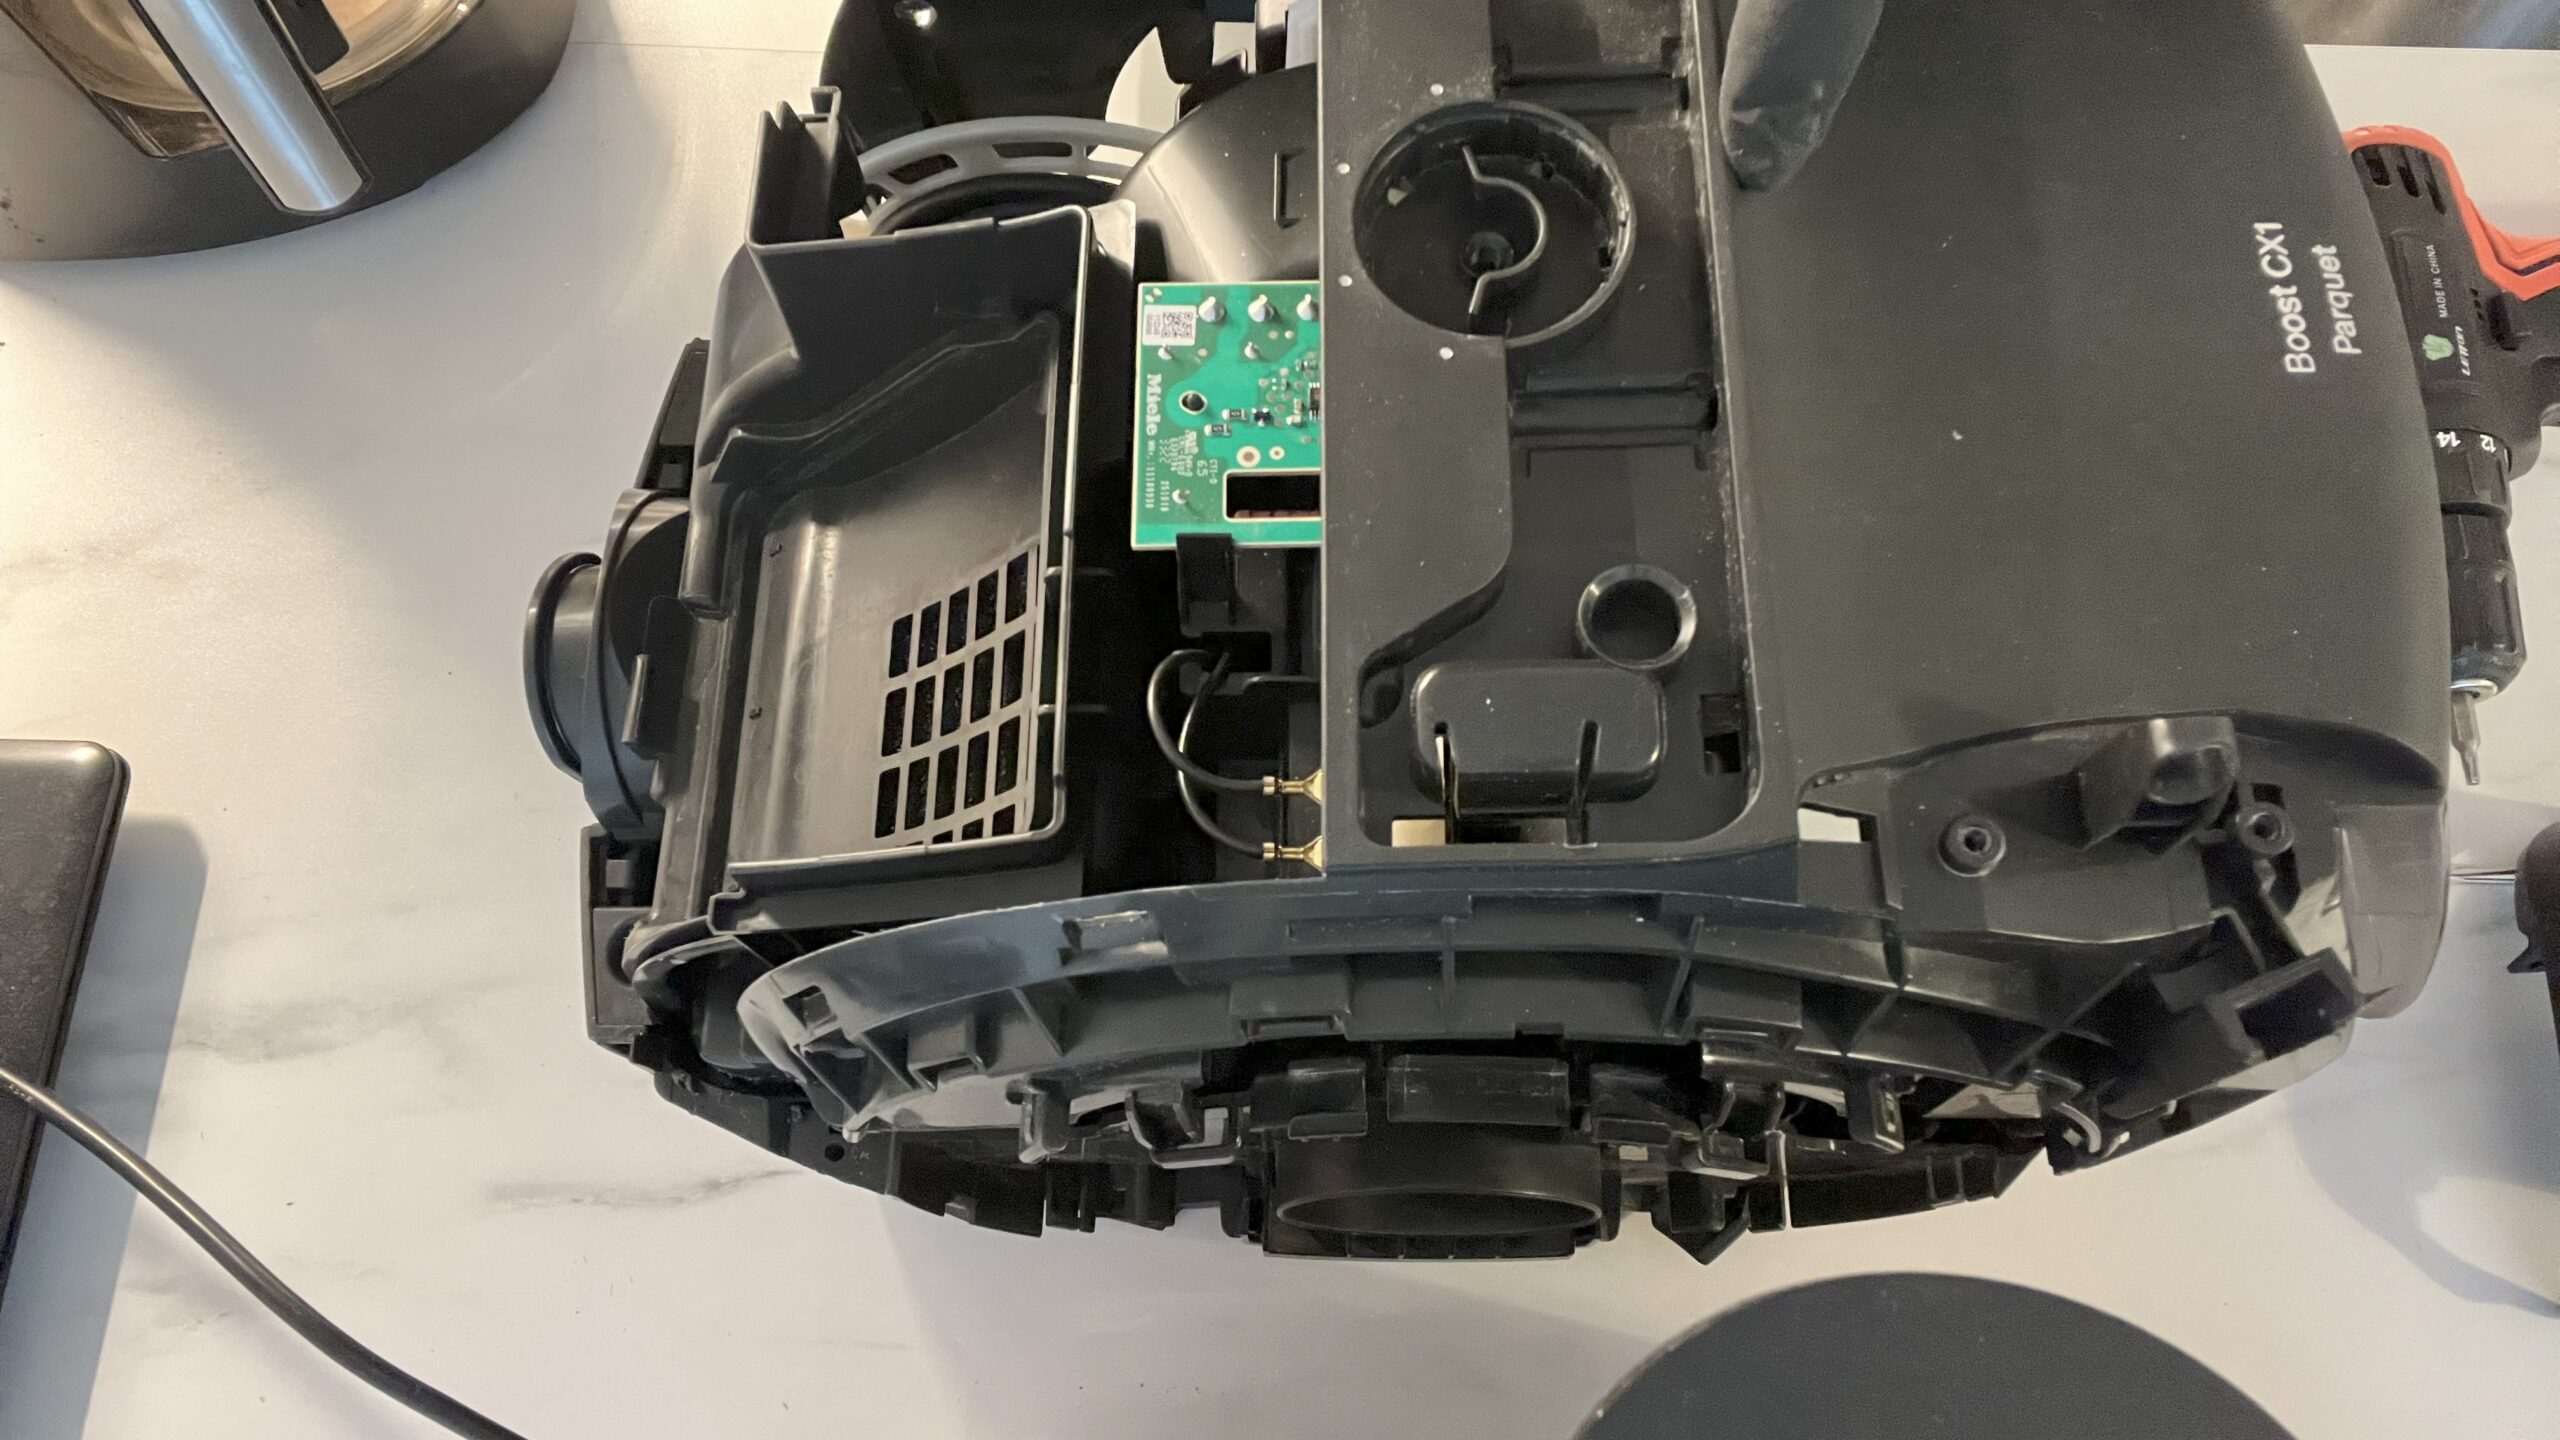
Once you undo the two screws holding the two compartments together, you will see the circuit board and on the side the cord reel. This is the big, wound-up coil that retracts the power cable.
Note to future self (and you): Be very careful here!
The reel is spring-loaded and can suddenly unwind like an angry snake. One wrong move, and you’ll spend 30 minutes rewinding it.
As for the circuit board, It looked… okay? No burn marks. No smell of death. Good sign so far.
b. The Motor Compartment
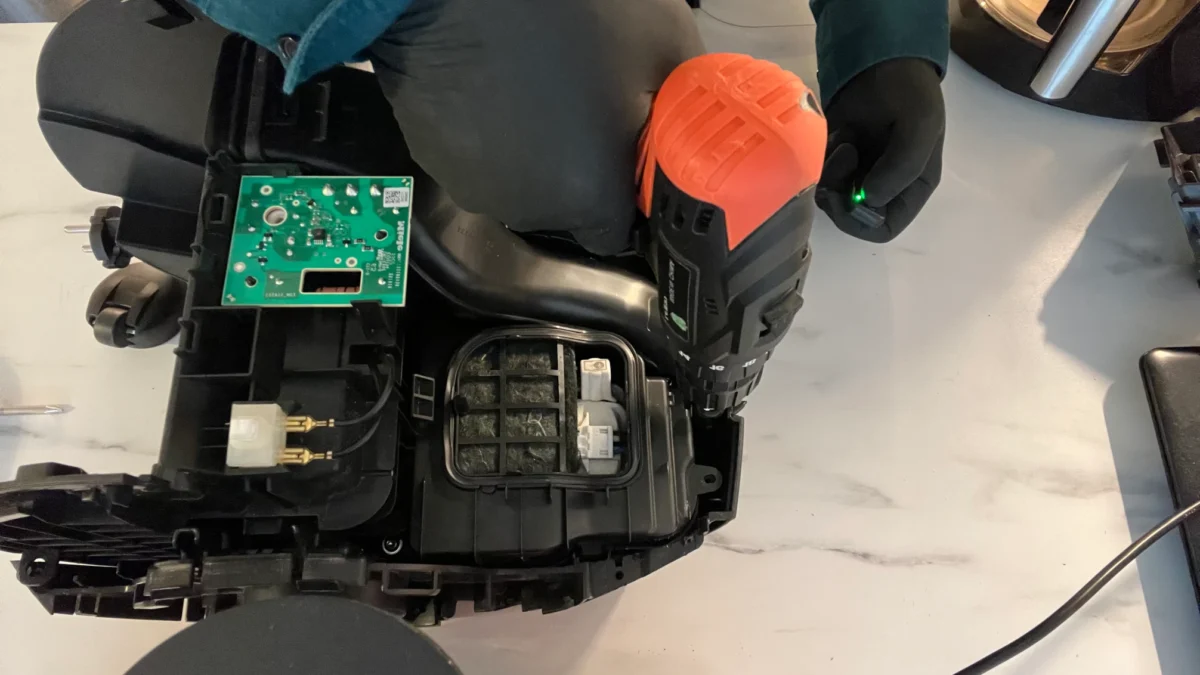
Now for the beast. Here’s where things got tricky, and honestly, kind of cool.
Motors are simple in theory: electricity spins magnets, which in turn spin a shaft, which creates suction. But, when water gets in there? Chaos.
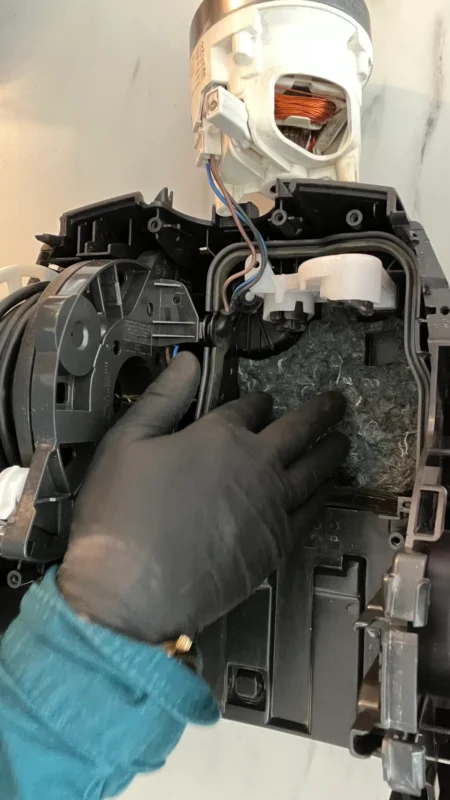
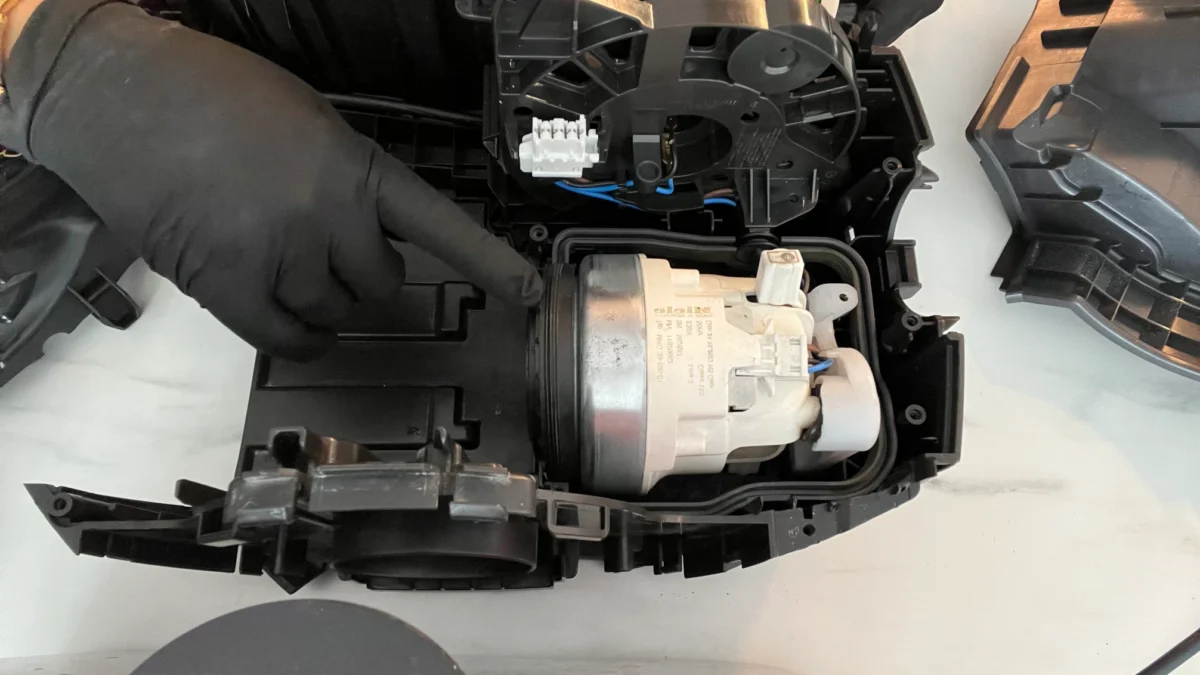
The motor sits nestled inside a black plastic casing inside the chassis. Held together with tabs, clips, and hidden screws. Designed by engineers with a cruel sense of humour.
After 45 minutes of fiddling, I managed to crack it open.
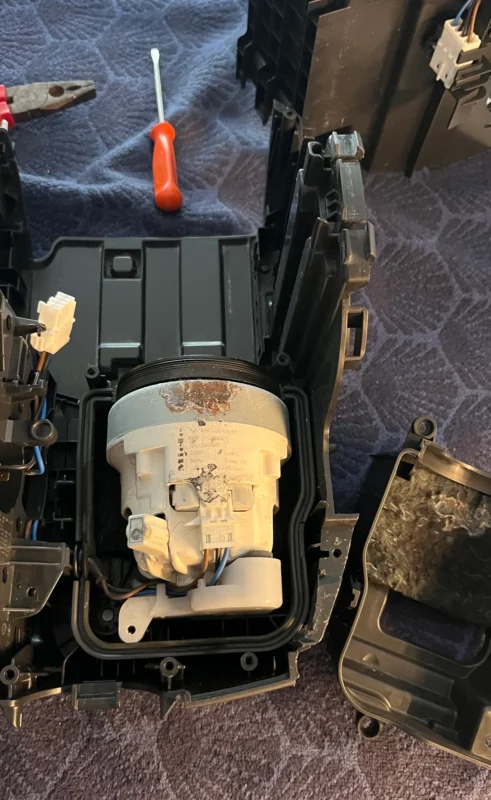
And there it was: the soaked heart of the machine.
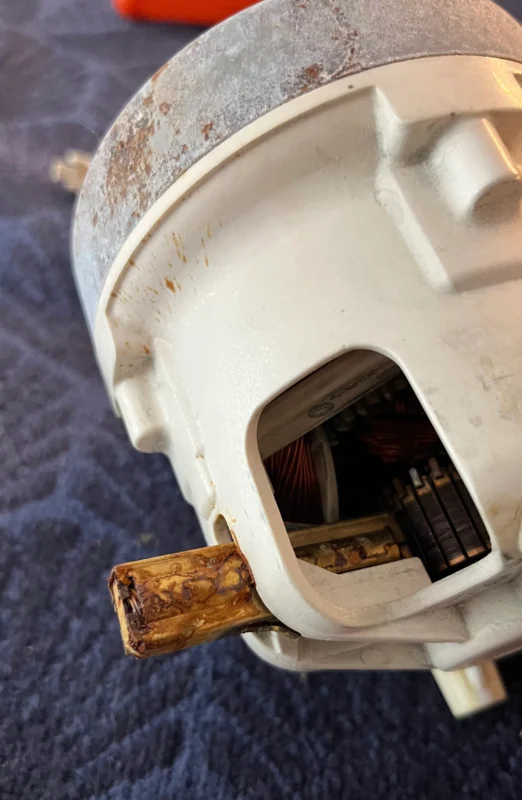
Inside the Motor: A Rusty, Damp Mess
The motor itself showed signs of brown rust forming. My heart sank for a moment…but then I remembered: WD-40.
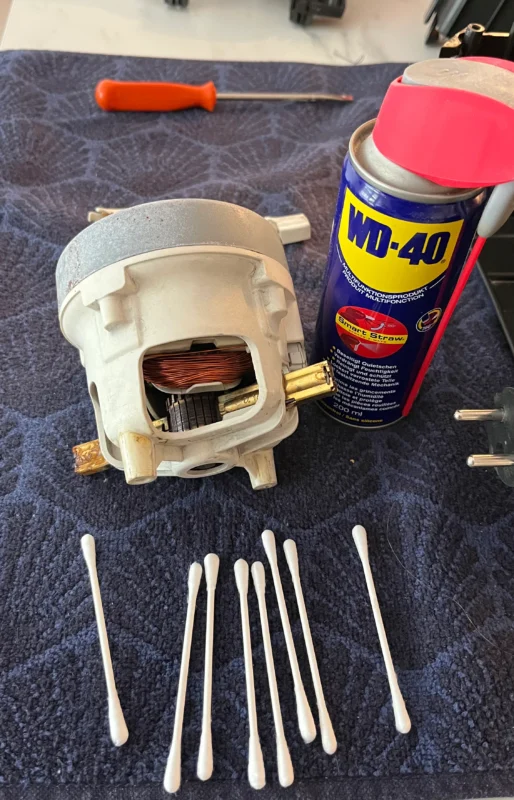
Now, let me be clear: never soak a motor in WD-40. But in this case, I lightly sprayed some on the cloth and gently cleaned the rusted areas.
For the bush holder, I used a cotton bud dipped in isopropyl alcohol first, then dried everything thoroughly.
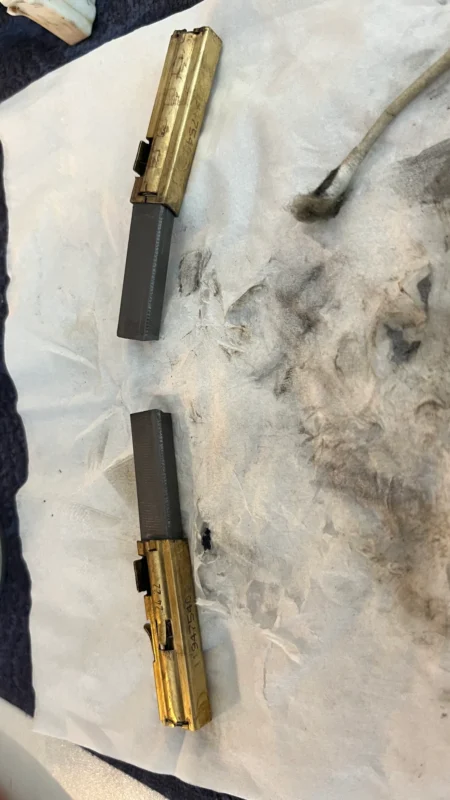
The brushes – the little blocks of carbon that transfer current to the spinning part – were discoloured. They had developed a white residue.
I removed them carefully and laid them on a paper towel. A little scorched but not disintegrated, which was promising.
The motor was wet. Not puddle-wet, but coated in the kind of sheen that says, “This could short out at any second.”
I spotted:
- Rust had formed and was spreading on the top,
- Heavy corrosion on the brushes,
- Discoloured brush holders,
- A weird smell (somewhere between toast and mildew).
I gently pulled out the carbon brushes. They weren’t crumbling, a good sign. I dabbed them dry, cleaned the holders with isopropyl alcohol, and gave the commutator a light polish with 800-grit sandpaper.
A whisper of WD-40 helped loosen stubborn rust – applied to a cloth, never directly.
I cleaned everything. Then let it dry for 48 hours in a warm, airy spot.
No shortcuts. Moisture ruins motors. I even pointed a small fan at it.
c. Air Path and Filter Housing
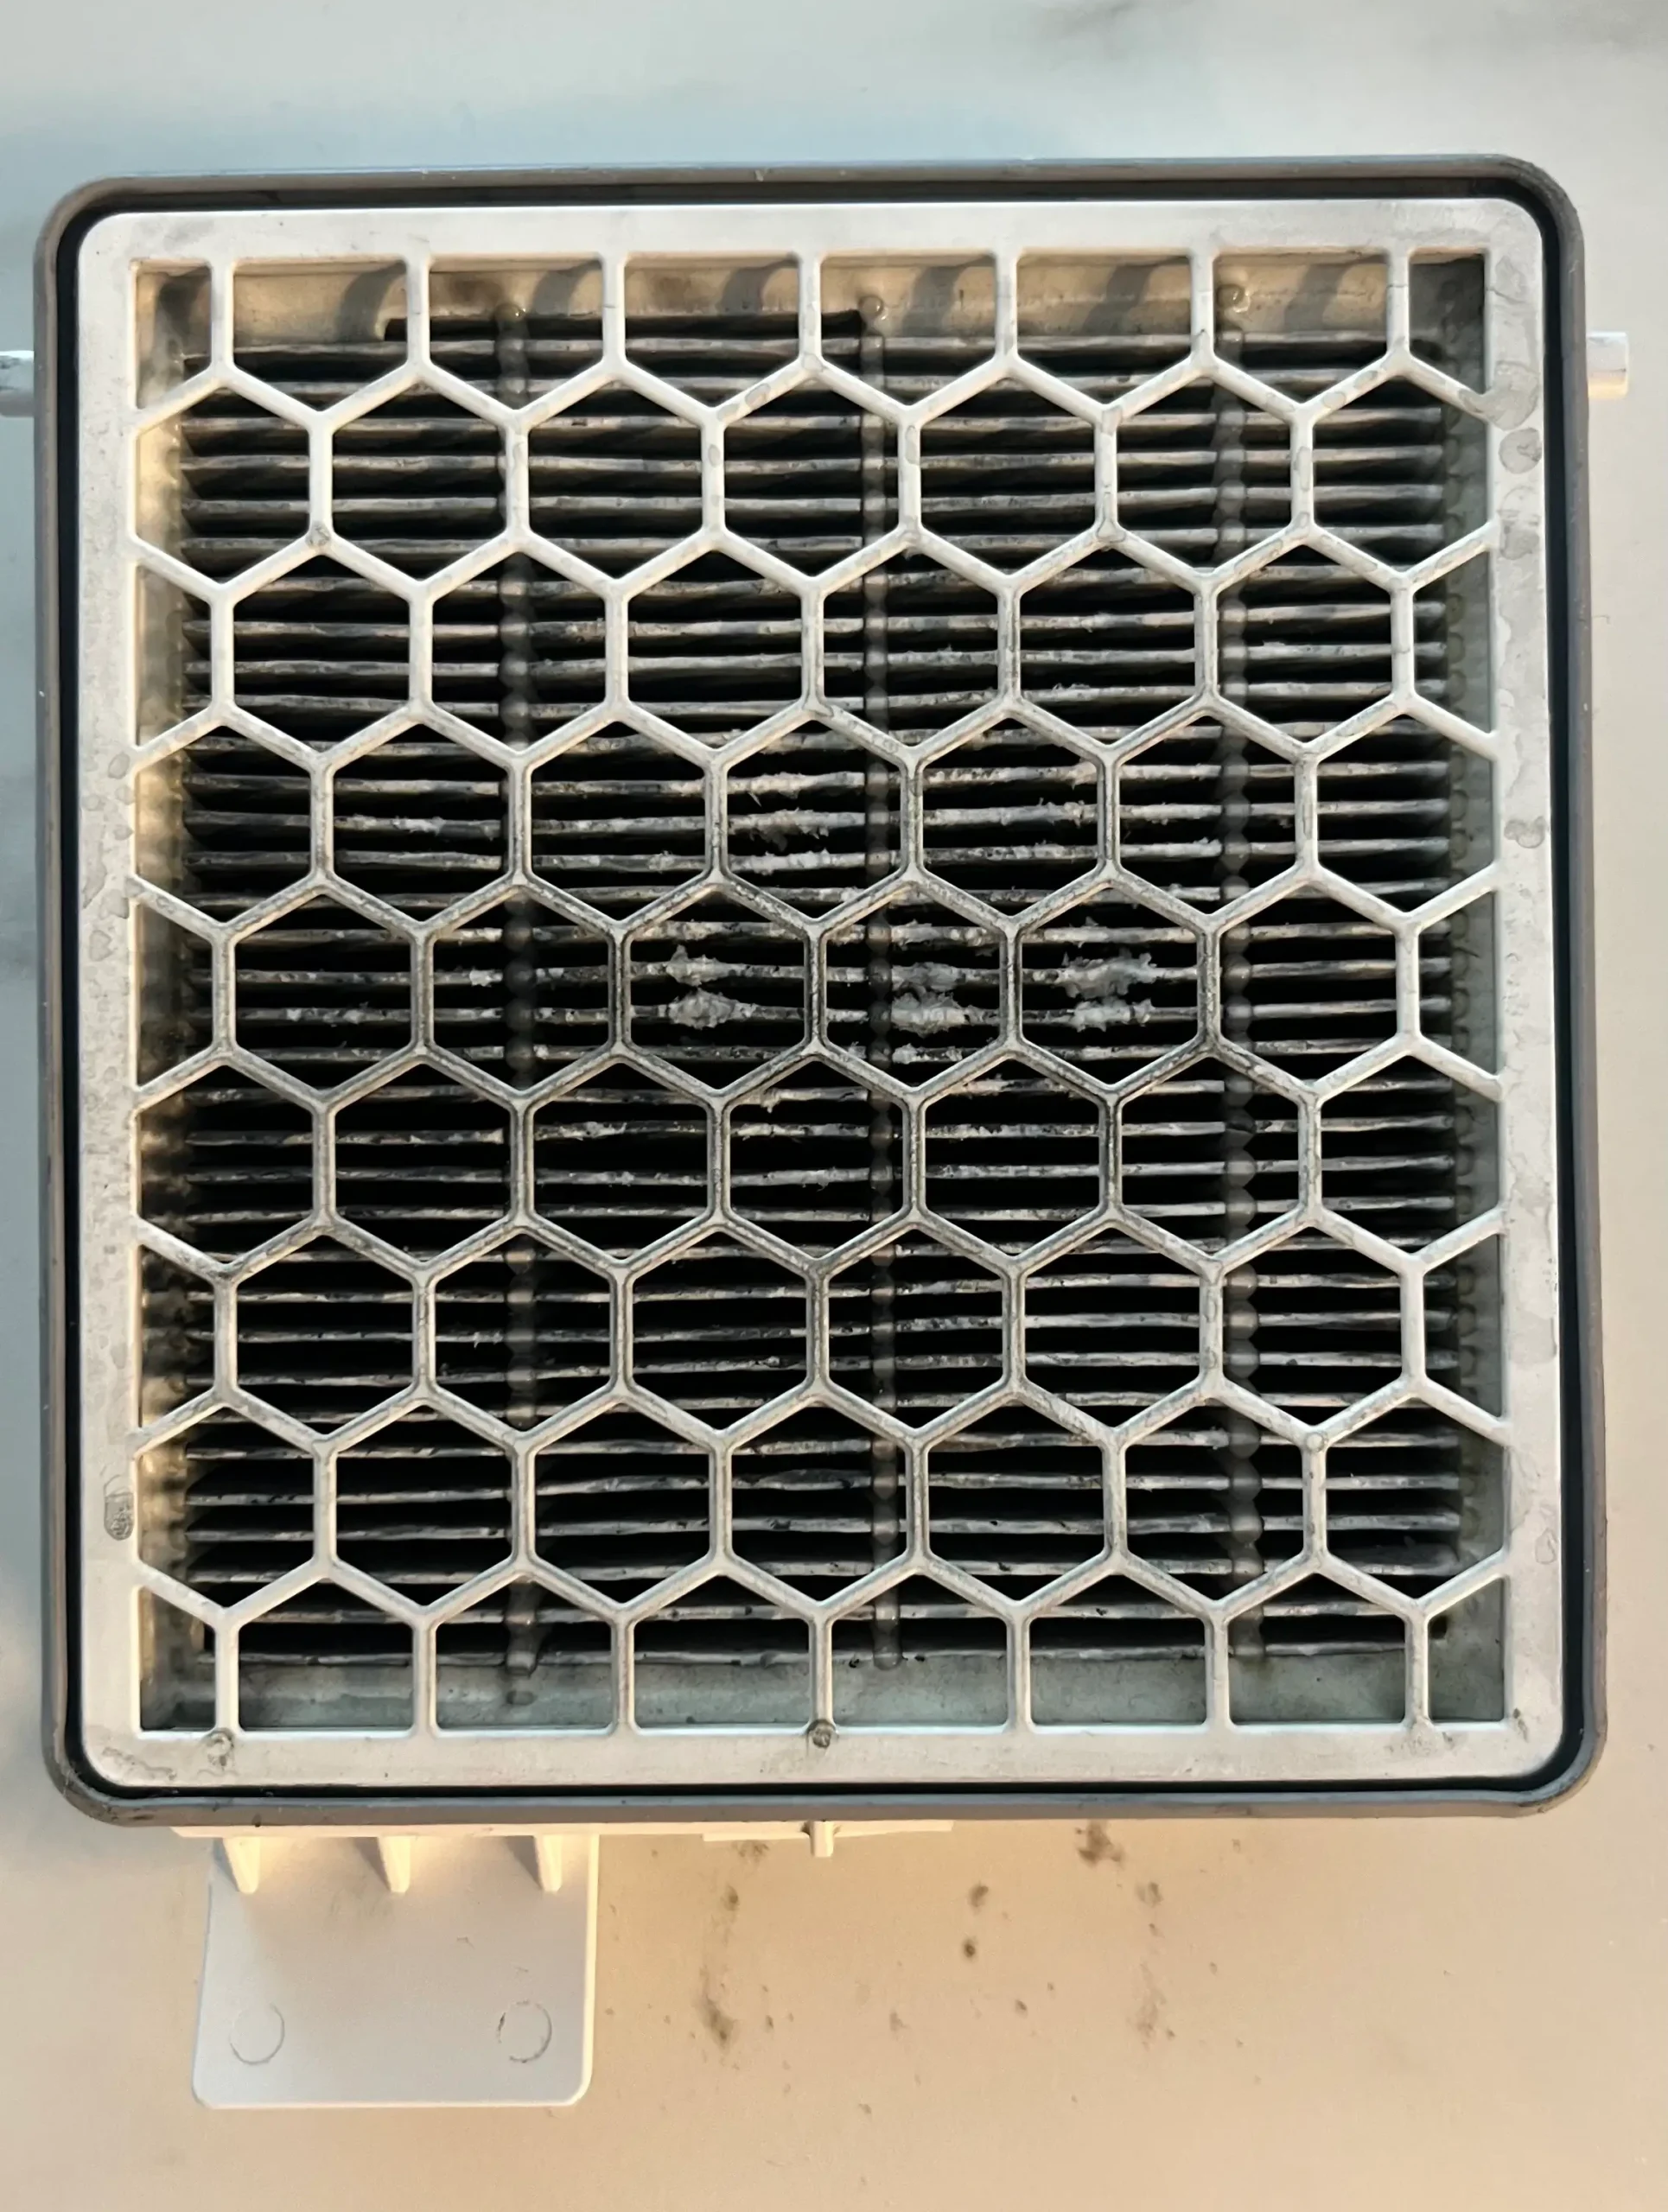
Here is something no one seems to talk about enough: filters after water damage. Mine looked ok, but when I sniffed them (yes, I know), there was a hint of mildew. That’s a slow killer for airflow.
So, I replaced the HEPA filter with a brand-new ones. The motor filter, I washed thoroughly and let it dry for 48 hours. Don’t rush this part.
A damp filter will send you right back to square one. Which, believe me, you wouldn’t want to know, knowing how Miele has built this fort of a vacuum!
I also cleaned the cyclonic dust separator and the fine mesh filter screen inside the bin. If you are going this far into a teardown, you might as well do a full spa treatment, right?
Even the rubber gaskets around the bin and filter housing got wiped down with a damp cloth and dried carefully. Any leftover moisture or grime is just future trouble.
Tip: If you ever suspect water damage in a vacuum, remove all filters immediately. Letting them sit wet can cause mould to grow, or worse, clog up airflow and stress the motor.
Reassembly & The Glorious Moment
After two and a half days of cleaning, drying, doubting, and a bit of existential dread, I began assembling it.
All the ducts, the bin assembly, the wiring harness, and the carbon all looked clean. Surprisingly clean. I was impressed!
Miele does know how to make compartments sealed. Not a single drop of water had managed to seep inside. Phew!
I worked my way up, screw by screw. Clip after clips. Panel by panel. Once I put it all together (I had to reopen it three times! Yes, I did!).
But I still, had doubts about the motor. Would it spin again? Was it shorted? There was only one way to find out.
The moment of truth!
I actually reassembled the unit loosely and tested the motor with an external 22-V connection (through an isolating switch, of course safety first!).
Held my breath. Pressed the power button. Then; WHIRRRRRRRRRRRRRRR.
It worked. It was loud, louder than before, but it worked. Yey! That glorious turbine sound. A little raspier than before, a reminder of its trauma, but consistent.
I stood there, equal parts stunned and smug. “I did it. I actually did it.”
I shut it off quickly and returned to a final cleaning of every crevice and finally tightened all the screws.
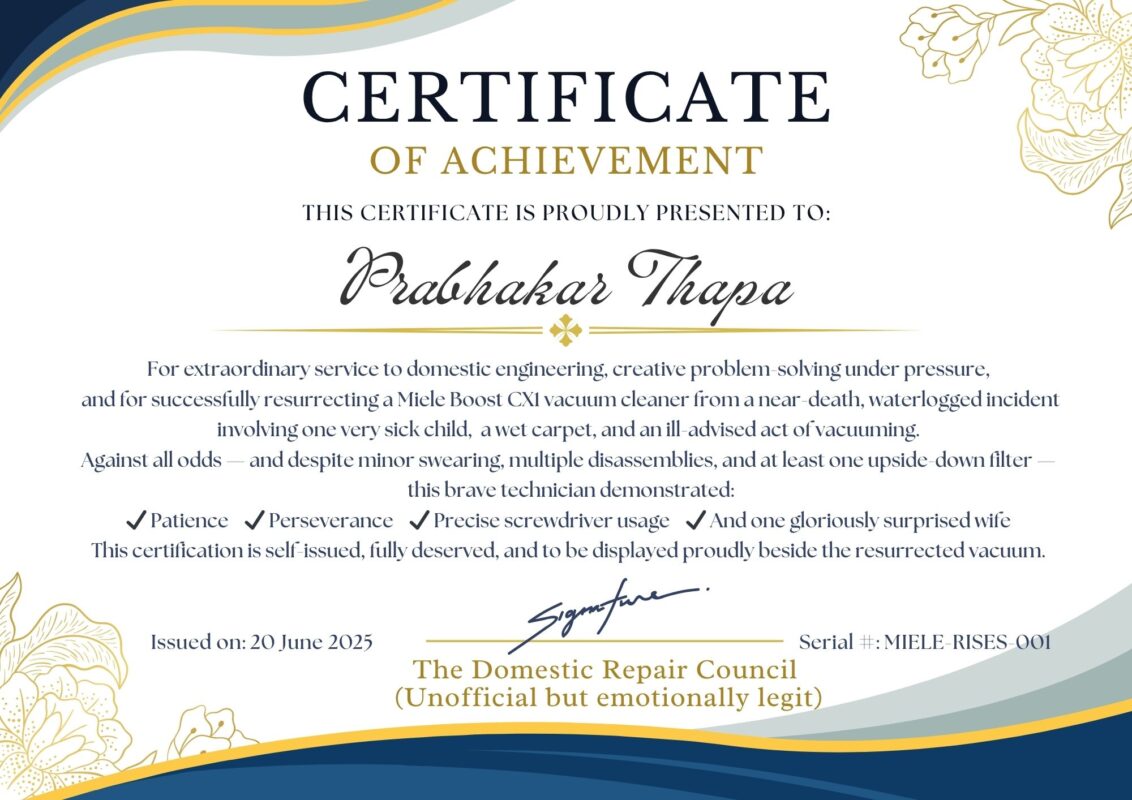
The Household Glory: Certified Home Technician (Self-Appointed)
After all the screws, sweat, swearing, and WD-40 fumes, and my wire-brushed skin, I figured I’d earned more than just a working vacuum.
So naturally, I awarded myself the “Certified Home Technician (Honorary, Self-Appointed, Stress-Tested)” title.
No formal test, no badge, just a moment of pure, well-earned pride. Just me, a cup of coffee, and a smug grin.
And the cherry on top? After seeing the short video clip of the happy machine humming back to life, which I had sent to my dear wifey, she responded with a genuine delight:
“Oh wow! Danke!”
That alone made the whole effort worth it.
If you’ve made it this far and your machine is alive too, congratulations! You’ve joined an elite group of kitchen-table engineers and midnight-fixers.
Badge not included, but pride absolutely is.
When to Repair vs Replace
Here’s what I learned:
|
Part |
Replace If… |
Where to Buy |
|---|---|---|
|
Motor |
Buzzes, no spin, smells burnt |
eBay, Miele service |
|
Brushes |
Crumbling, <1cm, sparks wildly |
Amazon, vacuum part shops |
|
Filters |
Smell musty or won’t dry |
Miele.com, compatible brands |
|
Circuit Board |
Burnt, no power, dead traces |
Specialist repairers |
Pro tip: Always test the motor separately before sealing it up again.
But here’s a twist: don’t throw away the accessories.
Keep the cord reel, hoses, attachments, wheels, and bin assembly. These parts wear out, and replacements cost a small fortune.
I now have a “spare bits” drawer just for my Miele because once you open one, you might find yourself fixing another.
Mistakes, Missteps and What I’d Do Differently
Now, full disclosure: This repair job wasn’t exactly a smooth, one-shot Hollywood montage. Think more along the lines of a blooper reel.
For starters, I forgot where one of the screws came from. It just sat on the floor like a smug little gremlin, daring me to figure it out.
I had to partially disassemble the housing – again – just to find its home. Guess what? It was actually for the cord reel bracket. I should’ve labelled things better.
Then came the backwards filter frame incident. I somehow mounted the filter cover upside down. It did snap in perfectly. Only when I couldn’t close the shell properly, did I realise: It’s upside down, you muppet. Classic!
Also, note to myself: drying something “until it feels dry” isn’t the same as letting it sit long enough. I rushed it the first time, eager to test it.
Moisture deep inside the motor wasn’t done evaporating. The motor gave off a smell that I can only describe as “hairdryer plus toaster.” Back on the stool it went for another 24 hours.
Moral of the story? Be patient, label parts, number them in sequence as you take them apart, and oh yes, laugh at your mistakes. They make for excellent stories later.
They make for excellent stories later.
Would I do it again? Hopefully not. But, if I had to, at least now I know how.
Quick Fix Checklist
- Unplug immediately
- Empty and remove all filters
- Open housing and document each step
- Dry every part for 48–72 hours
- Clean corrosion with alcohol and sandpaper
- WD-40 for rust — not on electronics
- Reassemble carefully
- Plug in, breathe, press power… and hope
Bonus Lessons Learned (For The Curious and the Cautious)
There are always details that you don’t know you need until you do. Here are a few more insights that didn’t fit into the main story, but might help you if you are also deep in a vacuum repair rabbit hole:
- Check the carbon brushes: If your motor uses them, worn-down brushes can be one of the reasons why it won’t start. Mine were still in good shape, but they are cheap and worth replacing if you are already in there.
- Inspect the wiring harness: Look for frayed insulation, especially around bends or connectors. Moisture can weaken these over time.
- Lubricate moving parts lightly: A tiny drop of machine oil on the motor shaft bearings can reduce noise and friction, but don’t overdo it.
- Re-test without filters first: It’s a good way to confirm the motor spins freely. Just don’t vacuum anything without filters. It’s purely for testing airflow.
- Label your screw bags: I applied mine by stage: outer casing, internal shell, and motor housing. Saves so much guesswork.
This journey reminded me how reliant we are on appliances, and how satisfying it is to reclaim control when they fail.
Fixing something by hand, especially when the manufacturer clearly didn’t want you to, feels rebellious. In a good way, really. But the satisfaction and the reward are simply worth it!
Questions That Lingered in My Heaed:
Yes, but keep it on low heat and move it around. Don’t fry the components. The goal is gentle warmth, not BBQ.
At least 48 hours. More in humid conditions.
If they smell or don’t dry properly, yes. They are cheap compared to a new vacuum.
Only if your vacuum shows no signs of life at all after drying and checking everything else. You’ll need a multimeter or someone who knows how to use one.
For the Boost CS1? Yes. It’s a solid vacuum, well-built, and most issues are fixable with patience and a screwdriver.
If you are not dealing with major electrical burnouts, you are patient, cautious, and follow safety steps, you’ve got a good shot.
Don’t panic. Double-check all connections. Look for one forgotten wire or misaligned plug.
In the worst-case scenario, look up refurnished motors or consult a local repair shop – you’ve already done half the work.
Oh yes, every second of it.
The Proud Moment
Final Thoughts + What This Taught Me
Now, full disclosure: This repair job wasn’t exactly a smooth, one-shot Hollywood montage.
Think more along the lines of a blooper reel — the kind where the lead actor keeps dropping tools, forgetting screws, and questioning his life choices while staring at a circuit board.
For starters, I forgot where one of the screws came from. It just sat there on the floor, smug as a gremlin, daring me to figure out its home. I had to partially disassemble the housing – again – only to discover it belonged to the cord reel bracket. I should’ve labelled things better.
Then came the backwards filter frame incident. I mounted it upside down. It snapped in perfectly, mind you – a flawless illusion. Only when I couldn’t close the outer shell did I realise: “It’s upside down, you muppet.” I know, Classic!
And here’s a big lesson: Drying something “until it feels dry” is not the same as drying it long enough. I rushed the process the first time, eager to test it. Moisture, still hiding deep inside the motor, gave off a smell I can only describe as “hairdryer meets toaster.” Back to the stool it went for another 24-hour timeout.
The moral of the story?
Be patient.
Label your parts.
Number your screws.
And most importantly: laugh at your mistakes.
They make for excellent stories later.
Would I do it again? Hopefully not. But if I had to, at least now I know how.
There’s a moment during every repair where you stop and ask yourself:
“Why am I doing this?”
“What if I make it worse?”
“What if I break it permanently?”
But sometimes, it’s not about the money. Yes, replacing the vacuum would have cost over €300. But this? This was about more than price tags and power tools.
It was about reclaiming control during a chaotic week.
Our son was sick. The vacuum died. Scratched my beloved BMW 520 (“Bluey,” as we call him). Life was… a lot.
But in the middle of all that?
Fixing the vacuum was a quiet victory.
A slow, satisfying, screw-by-screw redemption.
There’s something deeply grounding about taking a broken thing and putting it back together with your own hands. In a world obsessed with quick replacements and disposable everything, that’s a rare and healing kind of joy.
Sure, there were wrong turns. Swear words. One screwdriver gently yeeted across the room.
But every small win – prying open the housing, cleaning up the motor, hearing that final hum – felt like levelling up in some kind of real-life DIY video game.
I now look at repairs differently. Not with dread, but with curiosity.
- Maybe I can fix this.
- Maybe it’s not the end.
And here’s a massive shoutout to all the unsung heroes online – the YouTubers, Reddit warriors, and teardown photographers who give people like me the courage (and diagrams) to figure this stuff out. There were no exact instructions for this particular vacuum model, but what I did find gave me the confidence to try. That was enough.
So now? The vacuum’s back.
My son is better.
My wife is beaming.
And I have this story – one that still makes me grin every time I plug the vacuum in.
Oh, and one last thing:
Don’t vacuum wet carpets. Ever.
…Unless you want to earn your own honorary home technician badge.
It’s been working fine as new, and we love it. You ought to get one too.
Affiliate Declaration:
The use of affiliate links on this website may result in earning a small commission for any purchases made, at no additional cost to you (the user). Please review our privacy and cookie policy, as well as our affiliate disclaimer.


